We’ve already shared our Top Tips for using Facebook Live but if you are sat there thinking “Aggghhh. Not another Facebook feature for me to get my head around” help is at hand. Here we share our quick getting started guide for using live video content.
Getting started on Facebook Live
For now you will need an iOS device as Android isn’t supported yet. Make sure you’ve updated to the latest version of the Facebook app.
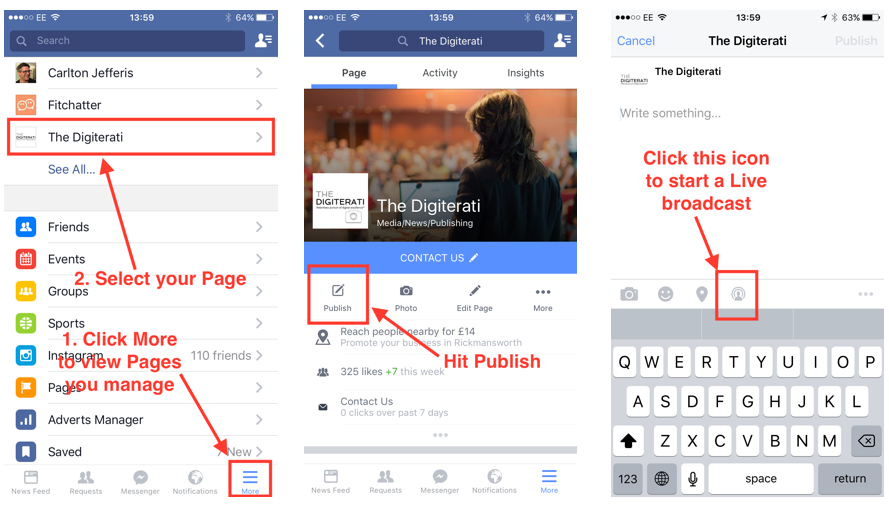
There seem to be some bugs if you are working through the Pages app (as usual the Facebook ‘move fast and break things’ mantra is in evidence). So for now you need to start your broadcast via the regular Facebook iOS app – navigate to your Page (click ‘More’ in the bottom right to see all your Pages) and on your Page click Publish. You should see the Live icon indicated in the screenshot below. If you are not seeing it force quit the Facebook app and start again.
UPDATE APRIL 2016: Contrary to the above, it now appears the only way for a Page to use Facebook Live is via the iOS Pages app (the bugs are now thankfully fixed!). The Live icon indicated below no longer appears when accessing via the regular Facebook iOS app. Instead use the Pages app, hit Publish and you’ll see the Live icon. However, the iOS Facebook app still allow a personal profile to broadcast Facebook Live video to their friends and followers. To do that navigate to your personal profile, hit Post (not Publish – they use different the terminology on personal profiles) and you’ll find the Live icon right there. If you find this confusing and need guidance just drop a comment and we’ll help.

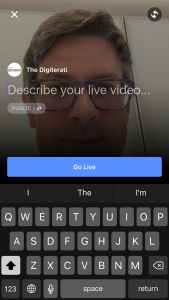
The Live icon is a graphic of a person’s head with a halo type effect around it. Press that for Facebook Live. You then write the title of your video and hit “Go Live”. If you are broadcasting as a private individual rather than as a Page you will be given the option to select your audience – so you could just broadcast to a small group of friends.
Here’s how the broadcast looks to your viewers (on desktop). Note that a count of live viewers is given in the top left and viewers also get the option to subscribe to future live broadcasts. This means that they will be notified (via notifications of course) that you are live.

Viewers can comment just like with any piece of Facebook content. The broadcaster sees the comments (see screen grab below) and can either like them or reply verbally during the broadcast. The broadcaster can’t reply by text to a comment during broadcast, but can do so after the broadcast ends.
It’s worth noting that viewers can also share the broadcast to their own timelines – worth remembering that and encouraging them to share during the broadcast.
See below for a screen grab of how the broadcast looks to the broadcaster. Note the viewer count, the time count, the comment thread and the button (top right) to flip the phone camera out of selfie mode to the rear camera.

Currently there is no obvious way of pausing a livestream. Our workaround was to turn the phone off. When Carlton turned it back on again he was offered the option to resume (see below). However, this was not that streamlined as the viewer (Marie) just saw a frozen screen and no auto-resume appearing.

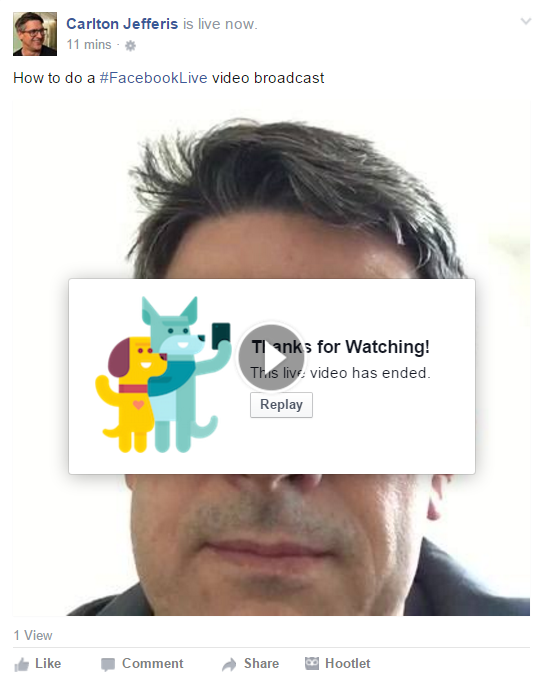
Once the stream is finished the viewer sees this. You can click to replay.
Practical tips
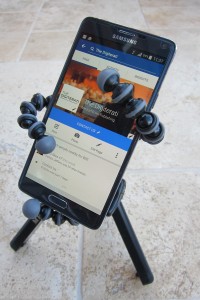
Avoid shaky camera syndrome by using a smart phone mount on a tripod or a cheap Gorilla style tripod (see below) that you can set up on your desk or even on the side of your computer screen.