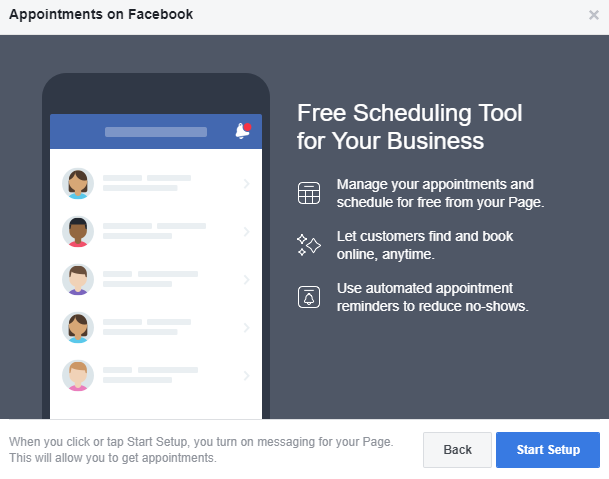
Facebook has introduced a new feature which enables you to accept appointments via your Page without the use of a third party app.
It is something that we at The Digiterati have done for a while via our WordPress site where people can book in an hour of our time for a quick phone or video consult. Apps such as. Acuity Scheduling, 10to8 or Vcita serve this market and there are several others designed more specifically to the gym, spa or salon markets.
You may have seen a prompt suggesting that you set up the appointments system when you have gone to post on the Page. That will guide you through the process with a helpful wizard. But if you’ve not seen the prompt then here’s what you do to get it set up (should take you all of 5 minutes!):
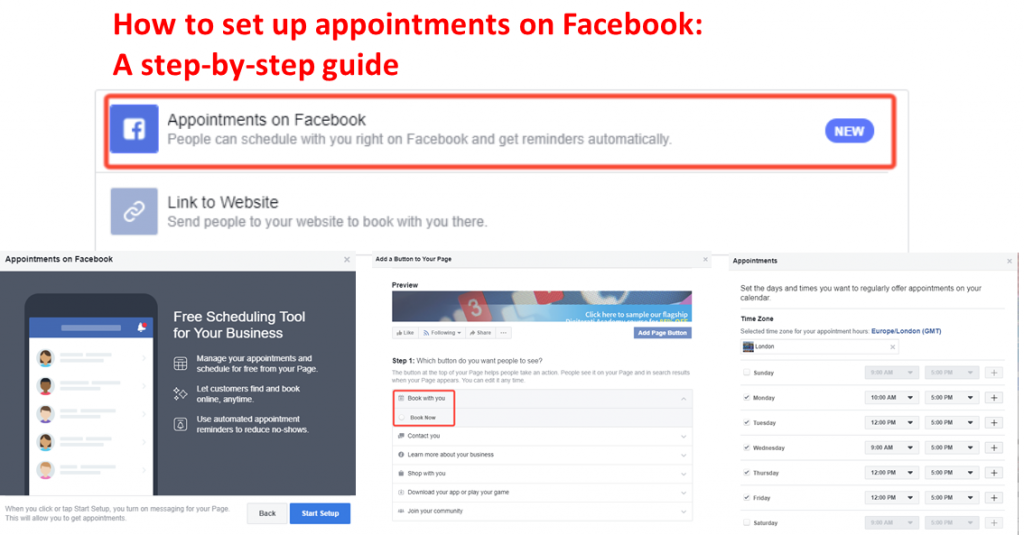
How to set up appointments on your Facebook Page
- Go to your Page and click the blue call-to-action button below your Page’s cover photo

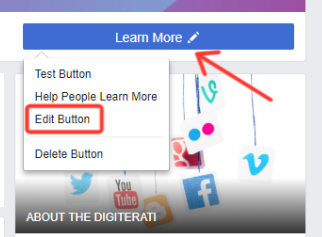
- Click Book with you and then click Book Now.
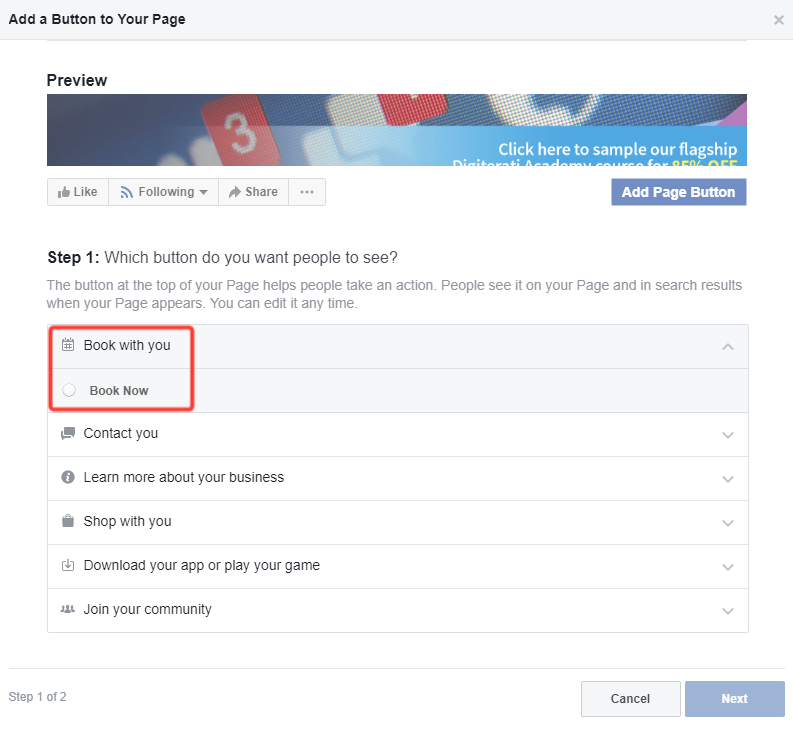
- Click Next.
- Click Appointments on Facebook to manage your appointments through Facebook.

- Click Start Setup and then click Next if you want to show your available appointments. If you don’t want to show your available appointments, click Not Now.

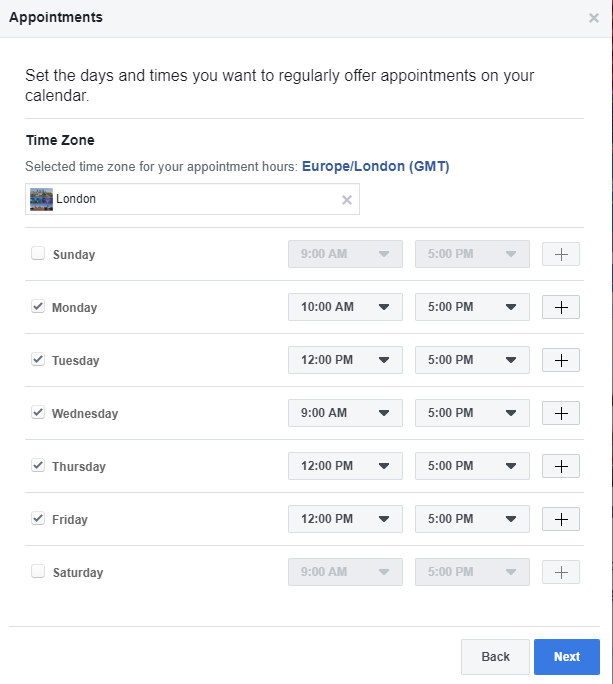
- If you chose to show your available appointments, set the days and times you want to regularly offer appointments on your calendar.
Select your time zone (mine was not accurate by default) and then click Next.
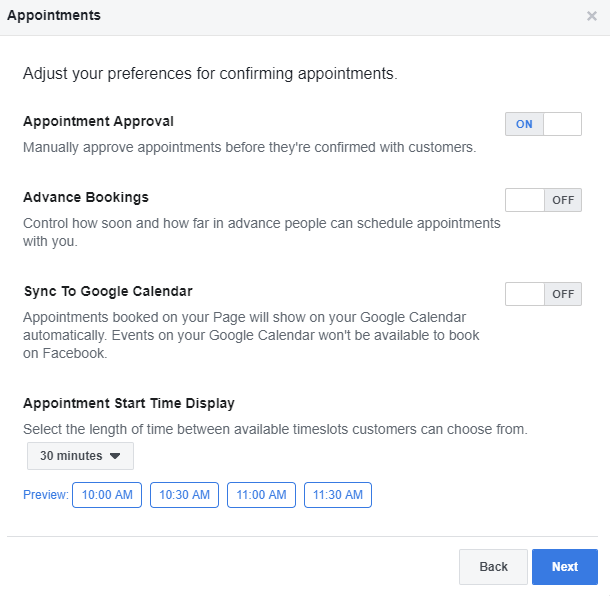
- Adjust your preferences for things like appointment approval and advance bookings and then click Next.
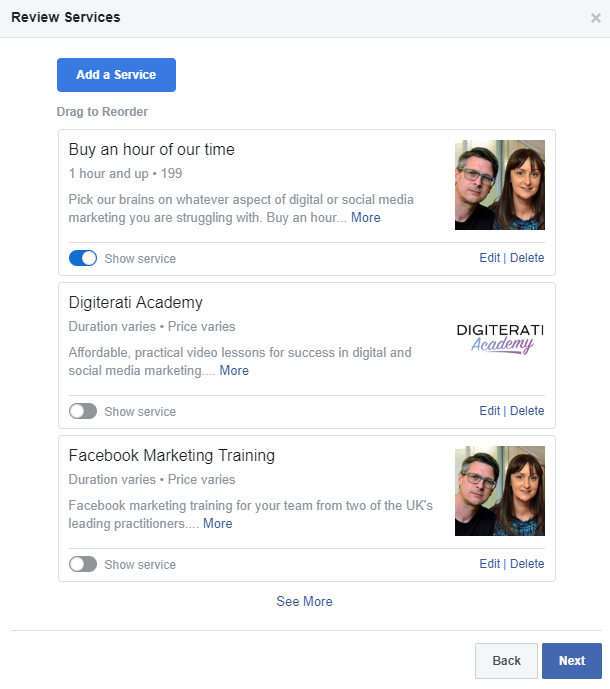
- Click Next to review your services. This will show any services you already have set up on your Facebook Page. If the service(s) you are promoting with your appointments is not there then you can select Add a Service to create one. Toggle the blue button to show the services you want to display then click Next.
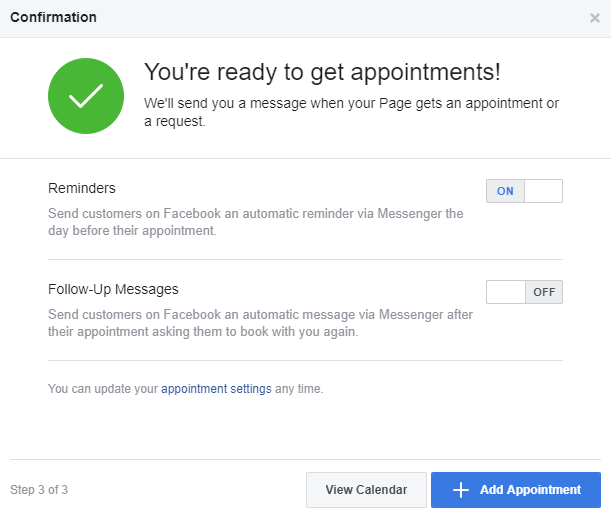
- Choose whether you’d like to send customers appointment reminders or follow-up messages and you are done.
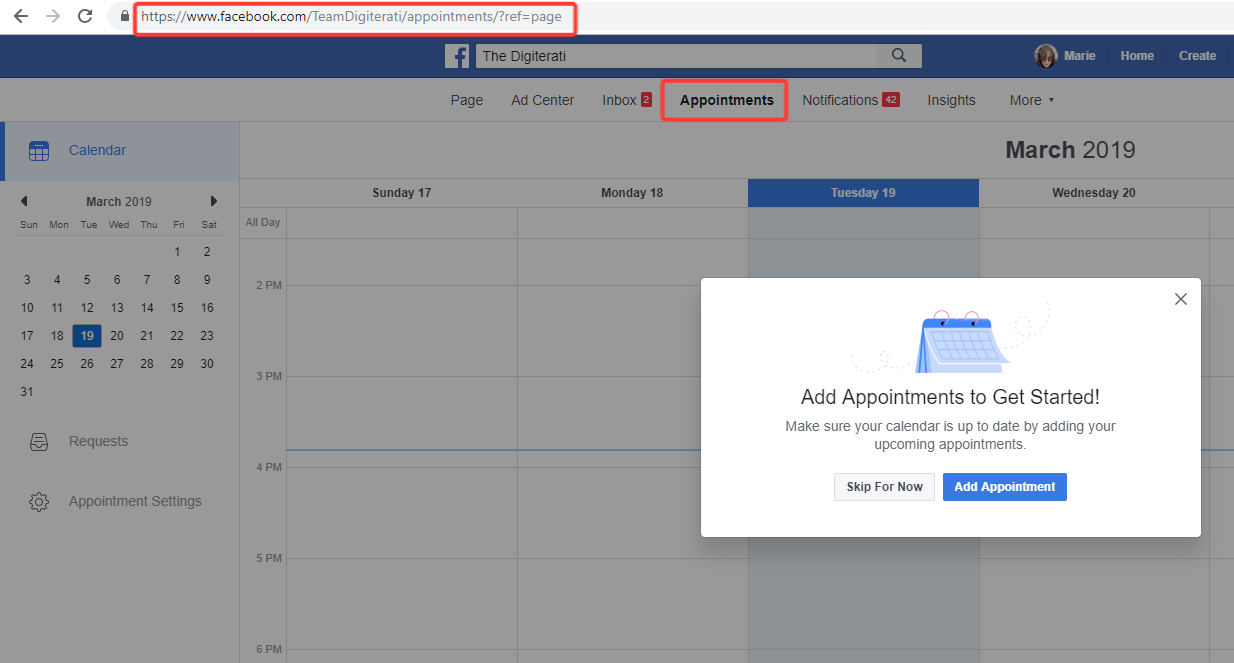
You can view your appointments in an online calendar where you can also manually add appointments yourself. Note also the new Appointments tab at the top of your admin view of the Page: