Nowadays you have to pay to get your Facebook content seen by more than a tiny handful of your fans. A Locowise study found that 40% of Page post visibility was paid rather than organic and that figure is on the rise.
Page Admins generally resort to the Boost button to increase the reach of their content but there are two other methods of creating an ad using an existing post or web page and this article examines how to create each of those and the differences between them.

The Two Things that KILL Your Chances of Success from Facebook Ads
This FREE video masterclass reveals what everyone is doing wrong and how you can get massive results from Facebook Ads
We’ll look at the performance differences between a boosted post, a promoted post and an ad in another article through an experiment to determine which is best.
#1: Boosting a post
Quick and simple, you click “Boost” on an existing organic post and then follow Facebook’s guidance to choose a target audience, select a budget and decide how long you would like it to run. Throughout the promotion you have the opportunity to extend it, add additional budget or even end it prematurely.
Facebook encourages you to think about who you want to see the post and what you would ideally want them to do with it do offers you a variety of objectives. as part of the process The objectives you are offered with a boost will depend on the type of post you are boosting.
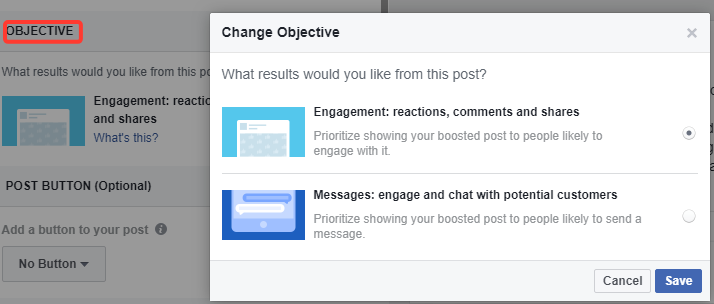
In the screen grab below the post was a photo and the default objective is for engagement whereby Facebook will show your post to people most likely to engage (react, comment or share). You can alternatively choose to have Facebook prioritise showing your boosted post to people most likely to send a message instead. This is only going to be relevant for a small number of scenarios.
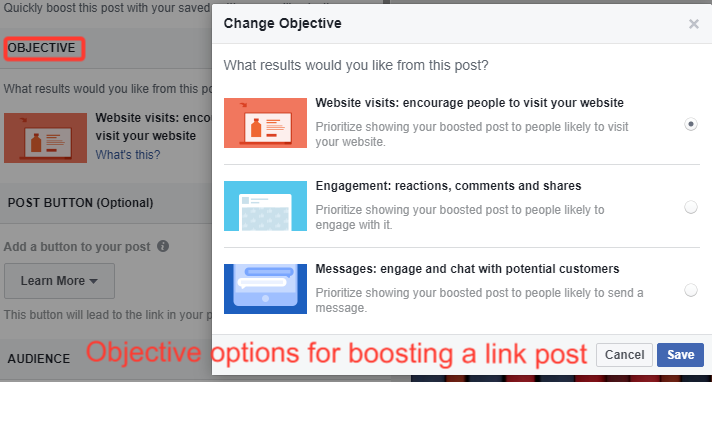
Most boosts, however, are generally for link posts – Pages want to drive traffic to their website and are willing to pay a little to Facebook to enable that. With link posts (as per the screen grab below) you get an additional objective choice:
- Website visits: encourage people to visit your website
Prioritize showing your boosted post to people likely to visit your website.
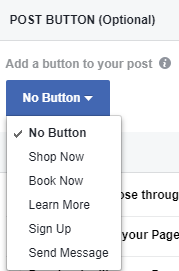
Other options you get with a boost over an organic piece of content include using a Call to Action (CTA) button – Facebook seems to like these and, in the advice I have seen, factors them in when awarding a relevance score. They are also shown to improve engagement rates.
It is best to choose a CTA that is in keeping with the content and what you would ultimately like people to do as a result of seeing your content:
You also get some simple targeting options which will instruct Facebook to show your content to specific audiences:
- People you choose through targeting (more on this below)
- Fans of your Page
- Fans plus their Facebook friends
- Any saved audiences you have previously created in Ads Manager
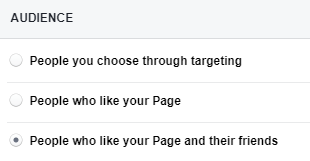
The limitations of boosting posts to fans (and friends of fans)
You typically want to boost a post to your fans – they are a warm audience who have already indicated that they want to see your content (if only the Facebook algorithm would play ball).
But you probably don’t want to boost to *all* your fans. It would be wise to be able to select those in a country or particular geographic area and, depending on your ideal customer persona, select age and gender as well.
When you choose the option to target fans or friends of fans you don’t get any demographic targeting options other than geography. That’s frustrating. You can workaround it once the boost is live by then jumping into Ads Manager and tweaking the targeting but that’s quite a hassle for something that was meant to be quick and simple.
Additional targeting options with some boosted posts audiences
Newbie advertisers often think it is good to show content to as many people as possible but that’s sloppy marketing that will cost you masses more money than you need to spend. Ultimately you want to show content to the people most likely to buy your products or services. So think about who they are. If they are men aged 35 to 45 who live in Norwich then limit your targeting to them.
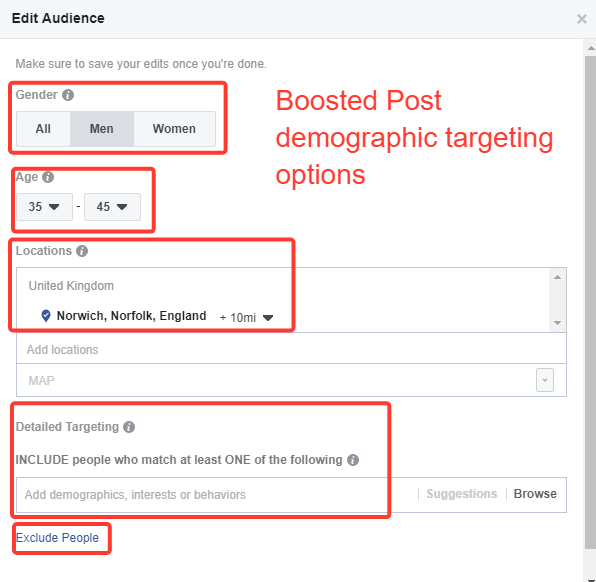
With the option of ‘People you choose through targeting’ you get quite a nice selection of Ads-Manager-style targeting options:
- Gender
- Age
- Location
- Detailed targeting – other demographics, interests and behaviours
- The option to exclude by demographics, interests and behaviours
Other features of boosted posts
You get to set a budget (some options will be recommended along with likely reach), set the duration of your campaign and also the option to track conversions using the Facebook Pixel.
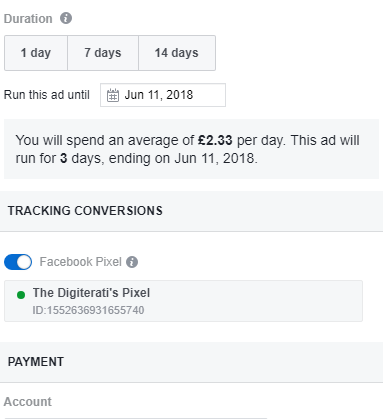
You can cancel the boost at any point, adjust the budget and extend the duration (Facebook will encourage additional spend and duration in a series of notifications). And if you did happen to want to change any of the targeting, you can do that from within Ads Manger.
#2: Creating a promoted post in Ads Manager: what’s different from a boost?
To create a ‘Promoted Post’ as opposed to a boosted post you will need to use Facebook’s Ads Manager. This can be somewhat daunting for the newbie with a plethora of decisions to be made amongst a lengthy series of steps but Facebook does guide you through the process (or you can take our Digiterati Academy ads course Zero to Hero with Facebook Ads).
You get a much wider choice of objectives (x11). I have highlighted the three that equate to the options on boosted posts in the screen grab below:
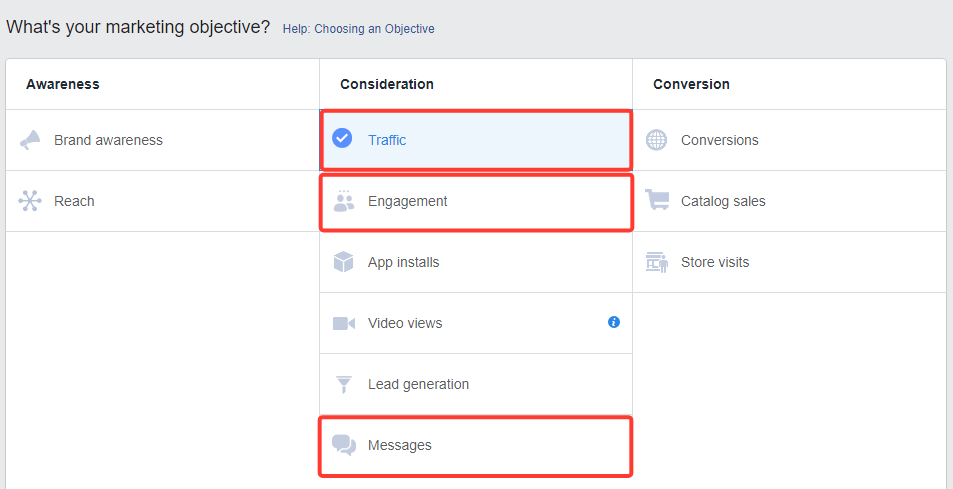
Targeting is similar to the boost with the following additional options. In Ads Manager:
- You can include or exclude custom audiences (so not just restricted to saved audiences as per boosted posts)
- You can select the age and gender of people to target including fans and friends of fans
- You get additional placement options (Instagram Stories, newsfeed, right hand column, Messenger, audience network etc)
- You get options for mobile device type and only to show the ad when connected to wi-fi
- You get additional optimisation options in relation to ad delivery with Facebook optimising for link clicks, landing page views or daily unique reach
- You get options on bid strategy setting a bid cap
- You can also choose to be charged by impression or by link click (this could well be a useful option)
- You can also choose to accelerate your budget to get results as quickly as possible (whilst you could do this with a boost it would require a workaround using a higher initial budget and short duration before then extending duration and adding budget)
How to create a promoted post using Ads Manager
The first two stages are as per any standard ads campaign whereby you select your objectives (at Campaign level) and your audience, placements, budget and schedule at Ad Set level.
The main difference is at Ads level.
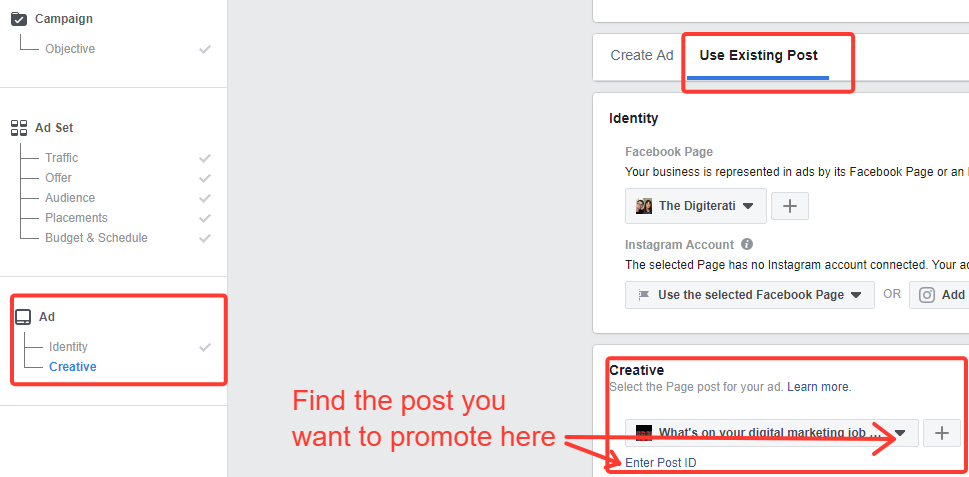
When you create an ad from an organic post (as opposed to boosting the post) you need to select ‘Use Existing Post’ rather than Create Ad’ when you get to the Ads level. Locate the post you are using either by scrolling through or pasting it’s ID.
#3: Create an ad using exactly the same link and copy as a boosted or promoted post
There is one other way to create sponsored content that links back to a blog post and that is to create an ad.
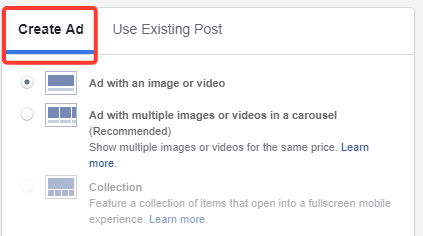
This is similar to the promoted post method shown above but instead of the option ‘Use Existing Post’ you select ‘Create Ad’ instead.
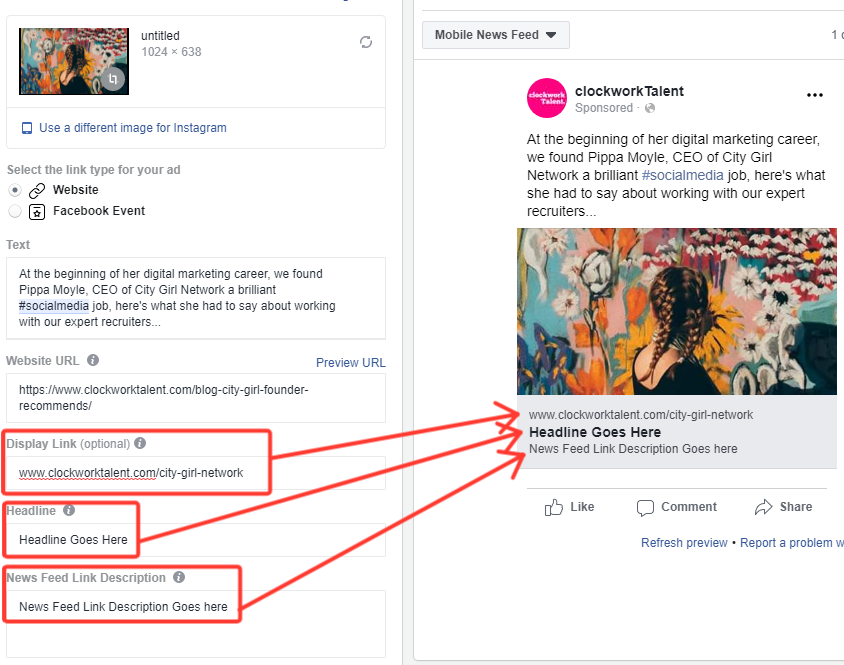
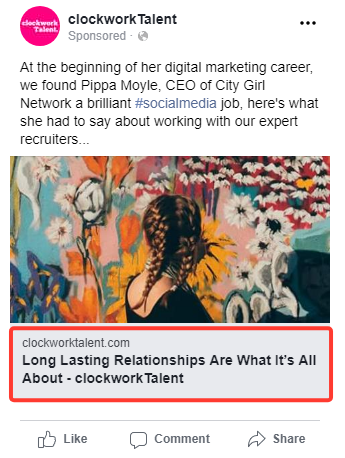
There will be no organic traffic for this content but you do get additional options including a Headline, Display Link and News Feed Link Description which are not available in the boost or Promoted Post (with these you are stuck with whatever metadata Facebook can pull through from your website in the case of a link post) as these variants from clockwork Talent show:
Summary: boosted posts vs promoted posts
The main difference is that boosting a post is quick and simple whereas promoting a post or creating an ad from an existing post takes quite a lot more time and requires knowledge of Ads Manager. However, you do get a lot more options with the Ads Manager route which may well suit your requirements, for instance, your post being seen on Instagram or in another Placement as well as options for changing the Headline, Display url and News Feed Link Description.
But the key question (which I haven’t answered here) is which is best?
Click over to my next article to find the answer to that thanks to a like-for-like split test I carried out in conjunction with clockWorkTalent.
Want more help with Facebook ads?
Check out my brand new course ‘Zero to Hero with Facebook Ads‘ in the Digiterati Academy. You’ll fast track all my knowledge of what’s working to create great Facebook ads right now and feel confident in your ability to run an effective campaign.
- How to set up appointments on your Facebook Page - 19th March 2019
- Social media content idea: WordSmith Cards - 11th March 2019
- Facebook for small businesses in 2019: a Q&A - 7th March 2019
- Is it best to boost a post on Facebook, promote a post or create an ad? - 13th October 2018
- What is the difference between a boosted post, a promoted post and a Facebook ad? - 13th October 2018
- How not to £@%!-up on social media! - 24th September 2018

